What you'll need:
- Small side-cutters (jewelery cutters, nippers, they are all the same thing)
- Needle-nose pliers, round-nose pliers, pencils, etc. (Any tools you have that you think could help you manipulate the wire)
- Wire (start with about 8 inches of around 16 gauge)
- I found working with silver plated copper wire was relatively the cheapest and easiest
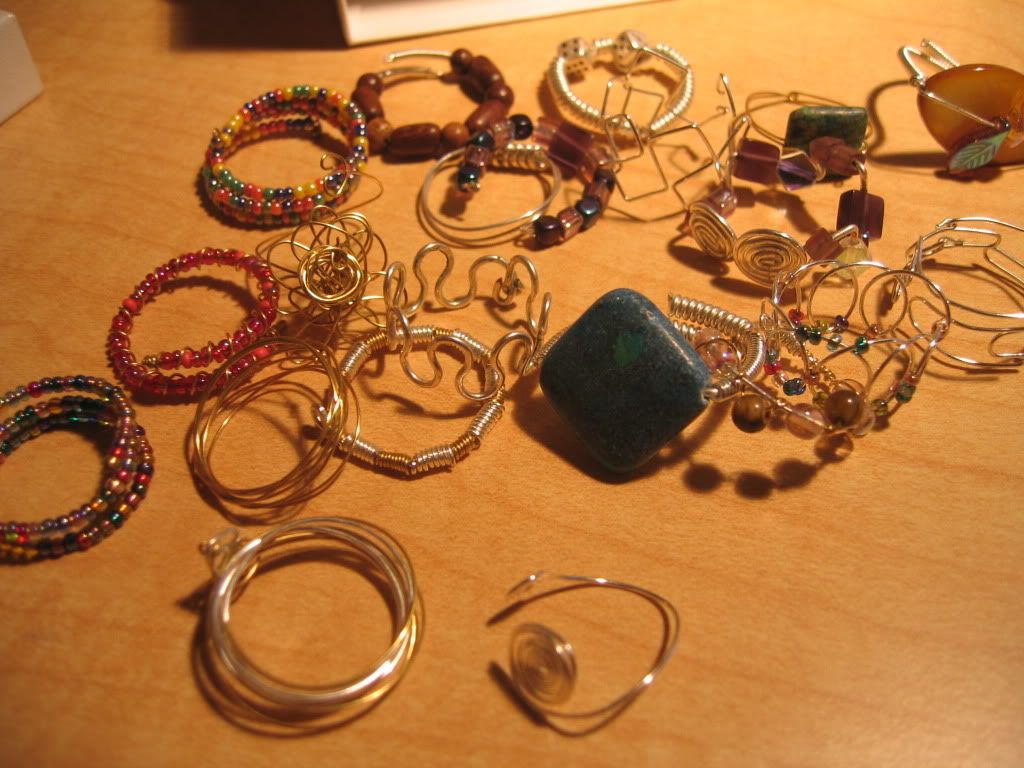
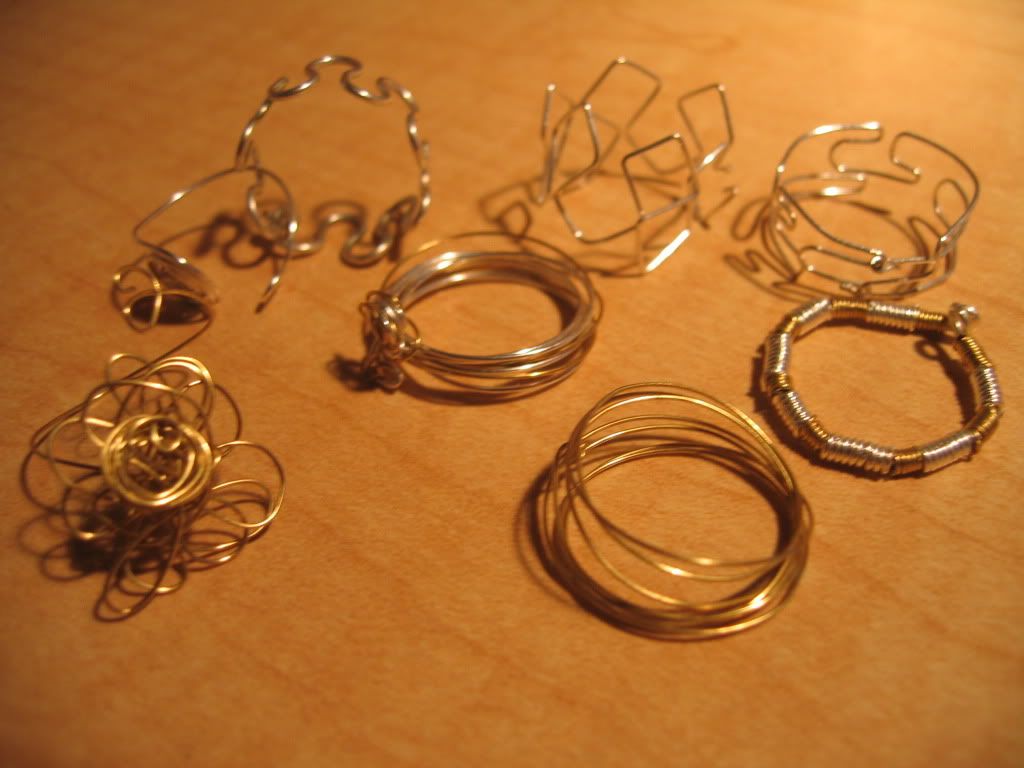
- I have pictured many brass rings as well. They aren't as easy to work with because they are more resilient and tend to discolor.
- Beads (if you want them)
- 5-10 minutes per ring once you get the hang of it
- Lots of patience--if you have a creative mind you will likely try many designs that end up being less than satisfactory
- $10-15 investment which will yield 10-20 good rings
Instructions:
- Cut off an extra long piece of wire--8 to 12 inches should be enough for almost any design pictured. As a formerly NASA certified wiring inspector, I have to impress on you the importance of using the right side of the wire cutters. The "V" side is trash (or your spool, later to be cut off as trash), while the flat side of the cutters is for the ring portion. This will make your rings smoother and less likely to snag clothing.
- Find inspiration. (See my pictures if you want some ideas)
- Go for it. The size of your design should be dictated by your own finger each step of the way. It should end up being a little longer than 2 inches in circumference if you are the type to measure rather than eyeball. Its not a big deal to mess up two or three times before you stumble upon a ring you like that is the right size.
- REMEMBER: It is much easier to fit the ring to your finger if you design it to have some give. Just like the majority of the ones pictured, a good wire ring design will allow the wearer to squish the ring together or pull it apart and will still look good.


